How to redact sensitive info in a screenshot on Mac
Read on 6 Oct 2026
Short answer
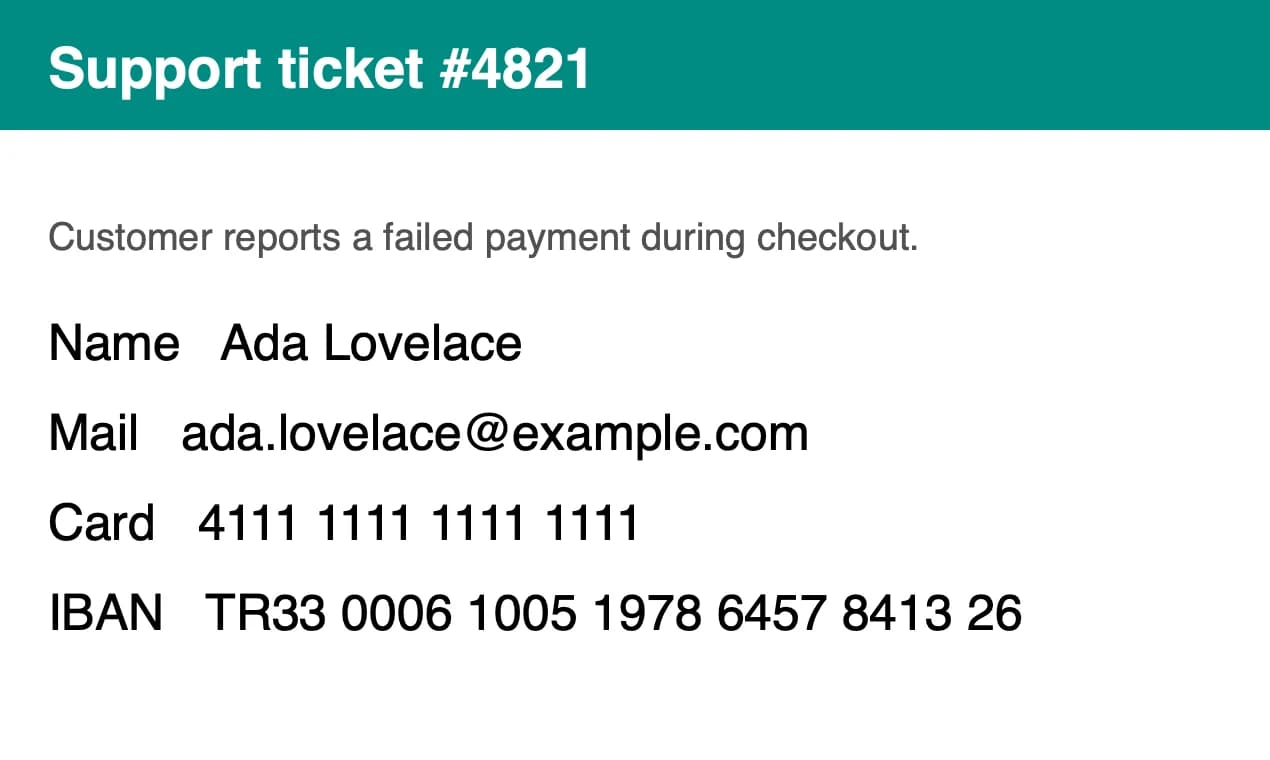
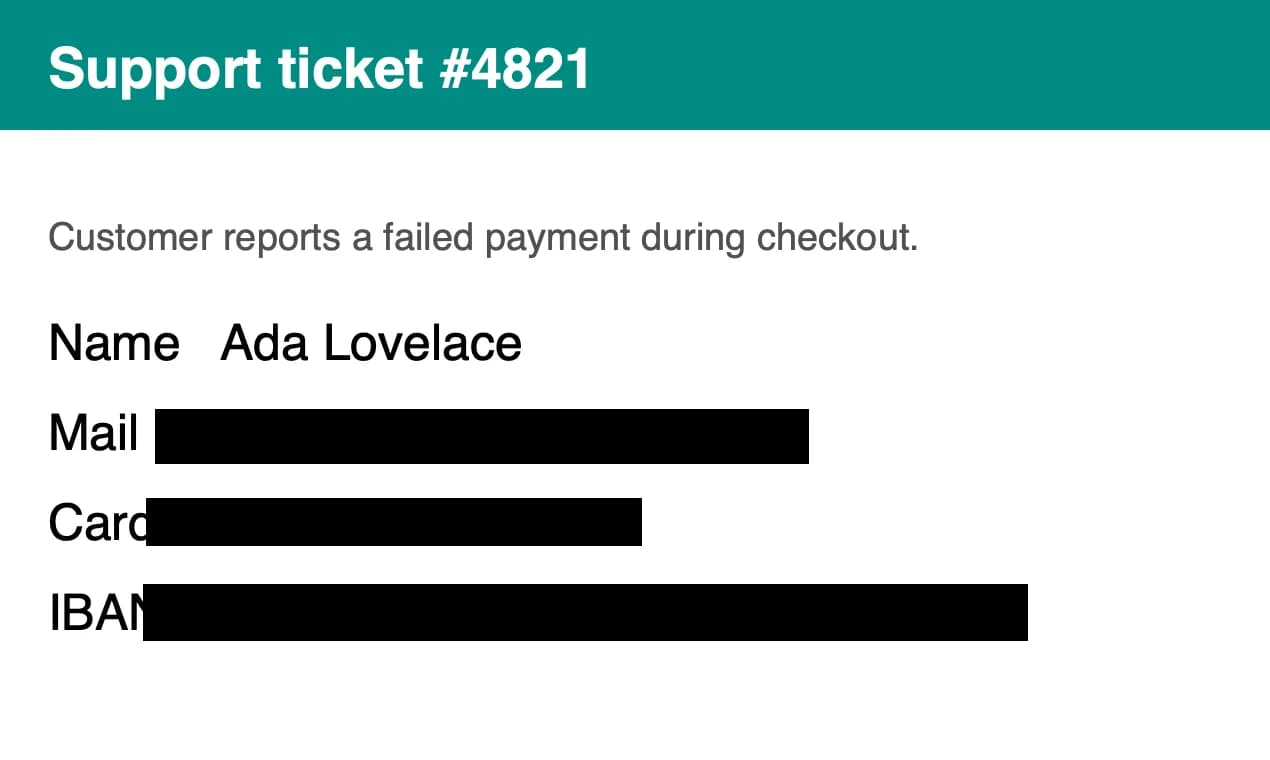
To redact a screenshot, cover the sensitive part with a solid, opaque fill and share the exported image, not the original. macOS can do a basic version of this by hand. Croptrove can find card numbers, IBANs and API keys for you and suggest covering them. Neither way is a guarantee: look at the result before you send it.
Way 1: macOS built-in, by hand
- Take the screenshot with ⇧⌘5 or ⇧⌘4.
- Click the floating thumbnail to open Markup.
- Draw a Shape over each sensitive item.
- Set Fill Color to a solid colour, not a transparent one.
- Click Done, then reopen the saved file and check each item.
- Share that file. Delete the original if it holds the unredacted version.
What macOS does not give you: automatic detection, or a blur tool (Apple's Markup guide does not list one). Preview's Redact tool is described by Apple for PDFs, and a user thread on Apple Community says it is not available for image files. If you must redact a PDF, that tool works there: "once you close the document, the redaction becomes permanent".
Way 2: Croptrove's privacy shield
- Install Croptrove and allow Screen & System Audio Recording.
- Press ⌘⇧4 and drag over the area. macOS uses the same shortcut for its own screenshots, and until you turn macOS's shortcut off, macOS wins. Croptrove's "Take over macOS screenshot shortcuts" screen shows you where (System Settings → Keyboard → Keyboard Shortcuts… → Screenshots).
- The privacy shield reads the text on your device and finds patterns like card numbers, IBANs and API keys. Nothing is uploaded.
- By default (Automatic blur mode) the findings come already covered with a solid fill; each row has Undo, and Undo all is at the top. Undo any you don't want. If you prefer to decide yourself, choose Settings → Privacy & Permissions → Privacy Shield → "Suggest only": the panel then lists the suggestions and covers nothing until you press Apply or Apply all. (The third option is Off.)
- Add any other item the shield missed by opening the Redact / Blur tool (shortcut B) and choosing the Redact style (solid fill, permanent), not Blur or Pixelate (both can be reversed).
- Export (copy, save or drag out). Redact changes the pixels in the exported file.
- Share the exported PNG. Do not share a project file (.cxproj); it contains the original.
In the default Automatic blur mode, History stores the masked image; the unmasked original is not kept. In "Suggest only" and "Off" modes, History keeps the original.
What to check before you share
- Names, emails, phone numbers and addresses the shield may not recognise.
- Browser tab titles, URLs and the menu bar.
- Anything behind a semi-transparent window.
- File names and metadata, if you share the file itself.
FAQ
Does the shield catch all sensitive data? No. It finds patterns like card numbers, IBANs and API keys and suggests hiding them, but no method is perfect.
Is blur enough? No. Blur and pixelate can be reversed. Use Redact for anything secret.
Does the redaction survive when I share the file? For an exported image, Redact changes the pixels. The data underneath is not kept.
Is the privacy shield in Pro? No. It is in the free version.
Do other apps do this too? Yes. Xnapper and CleanShot X also hide sensitive information; see our comparison pages. The difference with Croptrove is that it is in the free version.
Try Croptrove
Download Croptrove (DMG, macOS 14+) and test the privacy shield on a sample screenshot.